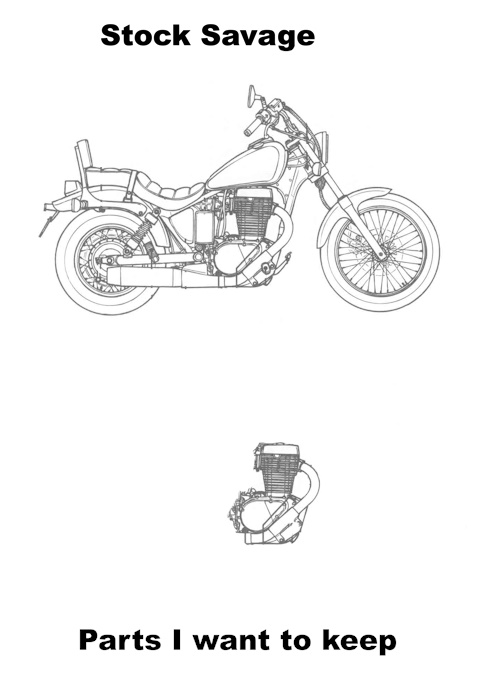
The Suzuki LS650 Savage Project
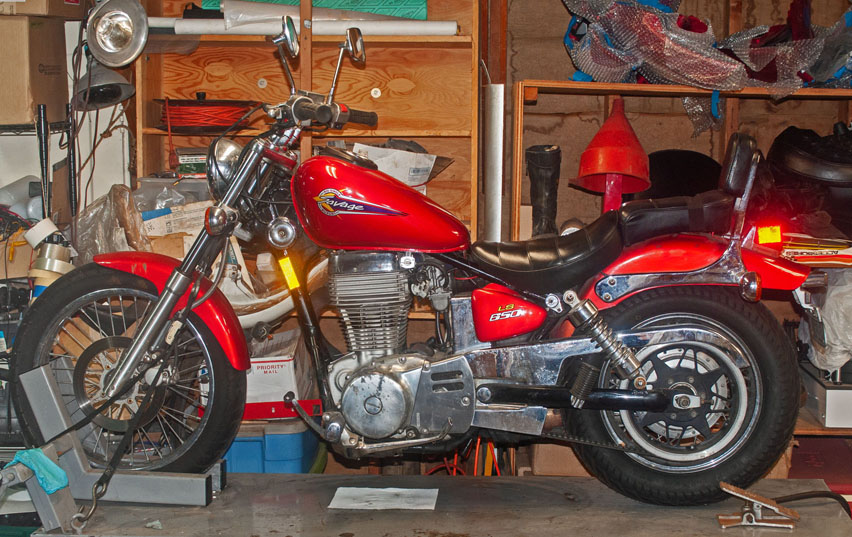
I bought my 15000 mile 1997 LS650 on Sunday, 05/05/2024. A week or so earlier I had been browsing the local Craigs List looking to see what kind of inexpensive bikes might be on the market. I didn't see much that interested me except for several of the Suzuki LS650 Savage/S40 Boulevard, a motorcycle that Suzuki built, with very little other than cosmetic changes (the big change was in 1993 to a 5 speed transmission from the original 4 speed) from 1986 to 2019. I was attracted by the engine (chopper/cruiser styling has never had much appeal for me) as I've owned and raced many four-stroke singles over the years: Honda S90, 250cc Motobi, 250/350cc Ducatis, 500cc Matchless, 500cc BSA unit single, 500cc Yamaha TT500, and a 560cc Can Am/CCM. So I decided to watch for one, and early that fateful Sunday morning I saw an ad that had been posted late the preceding evening. I contacted the seller and arranged to look at it.
I didn't get to ride it because a few days before the owner had started it up and then the vacuum petcock failed and filled the engine/air box with gas. A friend volunteered his services and truck and we picked it up on the following Thursday, and I started ordering service items like an OEM Yamaha Raptor petcock, filters, oil, etc. Since I'd already started reading at the SuzukiSavage.com forum before I went to look at the bike, I knew right away that the petcock was the likely culprit for the gas dripping from the airbox.
While draining the oil two weeks later I remembered too late that I needed to allow space in the drain pan for the quart or two of fuel that was in the sump (I'd already mopped out the airbox). But I got the drain plug put back in before recreating the Exxon Valdez in the garage. The oil/fuel mixture was quite black, so I put a new filter and a couple of quarts of fresh oil in and ran it for about 5 minutes until it was pretty hot (and boy it does seem to get hot). When I drained the sump again the oil was still noticeably dark, so I felt OK with tossing a couple of quarts of oil after flushing the engine. With luck the soak in oily gas will have cleaned out some of the sludge.
I drove it to the local gas station and got a gallon or so of gas and rode around the neighborhood (mostly up and down the hills here near the beach), a total of 2.4 miles by the time I got home.
Observations:
It sure is lean below 1/4 throttle. It needed the choke on for longer than I expected before it would stay running, and it didn't want to take much throttle until the RPM got up to mid->3/4 throttle. The owner before the one I bought the bike from had drilled 3 holes in the back of the muffler which probably didn't help, making it both unpleasant to listen to (loud and kind of a raspy sound) and I suspect adding to the lean condition. Chopping the throttle would provoke a loud backfire (or two).
At 6' tall I'm too large (height) for the bike. It has low bars without the risers (the prior owner was a not very tall woman) which weren't bad but the bars and footpegs are too close-coupled to the seat for me.
The Raptor petcock seems to be doing the job and so far there are no signs of fuel or oil leaks.
When I could get it to take some throttle the power seemed OK, but maybe that was just the "sound o' power" muffler mods at work.
I had 3 or 4 cars fail to yield the right of way when they had a stop sign (all of this was within 4-5 blocks of home) and I decided that I didn't want to deal with that. When I go for a ride on my Kawasaki EX400 I usually go late morning and mid-week during nice weather so as to try to minimize my exposure to traffic, so this quick ride on a Saturday afternoon made me feel like sticking to those midweek times is probably a good plan.
I bought the bike to be a project. I would have been happy to get a cheap crashed bike with engine/frame/current clean title/electrics, but this is what came along at the lowest price with "no hassles at DMV" papers (in and out at AAA in 10 minutes for the transfer of title). I think the engine can make for a fun bike once it is made to run decently. But that fuel I put in the tank is going to get drained and put in the Kawasaki, because I've no desire to ride the Savage in the condition it is in.
So that frees me to start taking it apart and turning it into something else. I've thought of a few options but I haven't settled on one yet. I'm starting this project page and I'll update it as I do something. It won't be one of those "one week from start to finish" deals though, as I'll fiddle with it when I think of something I want to do and have time to do it. I am sure that there will be very little of the original bike left when I'm done, which seems a shame to do to a reasonably clean bike. But maybe someone near to SF will get a chance to come and collect some spare parts so I don't have to try to squeeze them into the recycling bin.
I will try to use this project to illustrate some of what I've written elsewhere on the site about the planning, design, and construction of a project. The flow may be a bit disjointed because I intend to do a lot of changes, and what I do at any point in time will depend on what has caught my interest. So I may start off with some engine-related comments, switch to the chassis, and back again, with diversions into side topics along the way. I may post new material on a flow basis at the bottom of the page or instead have some major headings and sub-headings where the material will be posted. Is it better to group by topic or as a timeline, or maybe some of both? Perhaps a good method might be a brief timeline at the top (functioning as a table of contents) that then links to the new material under a topic heading? I'l give that some thought. As with many things there are usually several good ways to accomplish a goal.
If you find the Savage of interest I want to recommend you check out the forum at SuzukiSavage.com. There is a lot of interesting and useful information there, and since the bikes have been out so long there is a good chance that if there is a problem area (like the aforementioned vacuum petcock) someone has already identified it and come up with a fix.
Suzuki Savage/Boulevard Wikipedia entry
I'm Not Building a Race Bike
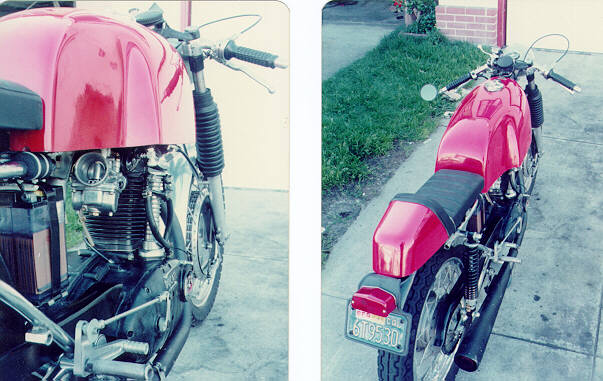
This is a change for me, as most of my projects have been intended for competition use. My 750GT Ducati and 650 Cagiva were ridden on both the street and the track. My first project bike, a 350 Ducati, was done in the early 1970s when cafe racers were the big thing, and several decades later I did a "resto-mod" on a Honda S90 which got a lot of NOS parts but also alloy rims, a 2LS front brake, and a camshaft and piston upgrade. The Kawasaki EX400 Ninja that I bought new in 2020 has been left untouched other than installing K-Tech cartridges and rear damper. It has been an interesting change to own a street bike that I can actually ride whenever the urge strikes me (and the weather and life cooperate).
Not building a race bike has an effect on the goals. One of them is that instead of trying to budget for the highest performance parts (the lightest wheels and brakes, the best suspension, the most powerful engine) I can reasonably afford, I can instead select and purchase items based on the basis that they are "good enough" and are more affordable. Instead of buying a set of race wheels for $2500-3000+, I can find a clean set of modern sport bike wheels that, while not as light, might save me $2000 or more. Even among street parts there will be a range of price/performance ratio. I recently missed a set of clean wheels/brakes/sprocket from one bike for $750, but then found several sets of wheels that, while a bit heavier, saved me one-half of that price. Since this is not a race bike, I can say "yes, I'll accept the slight penalty in performance **that isn't going to matter** and have some money left to apply to other parts where it might matter".
A large part of the planning process is gathering data to find out what you have. It is difficult to get from point A to point B if you don't know where point A is located. I'll start with some basic headings and begin filling in the information I find.
Engine:
After reading DragBikeMike's (DBM) technical articles at the Savage forum I decided I should pick up a spare Savage head to inspect.
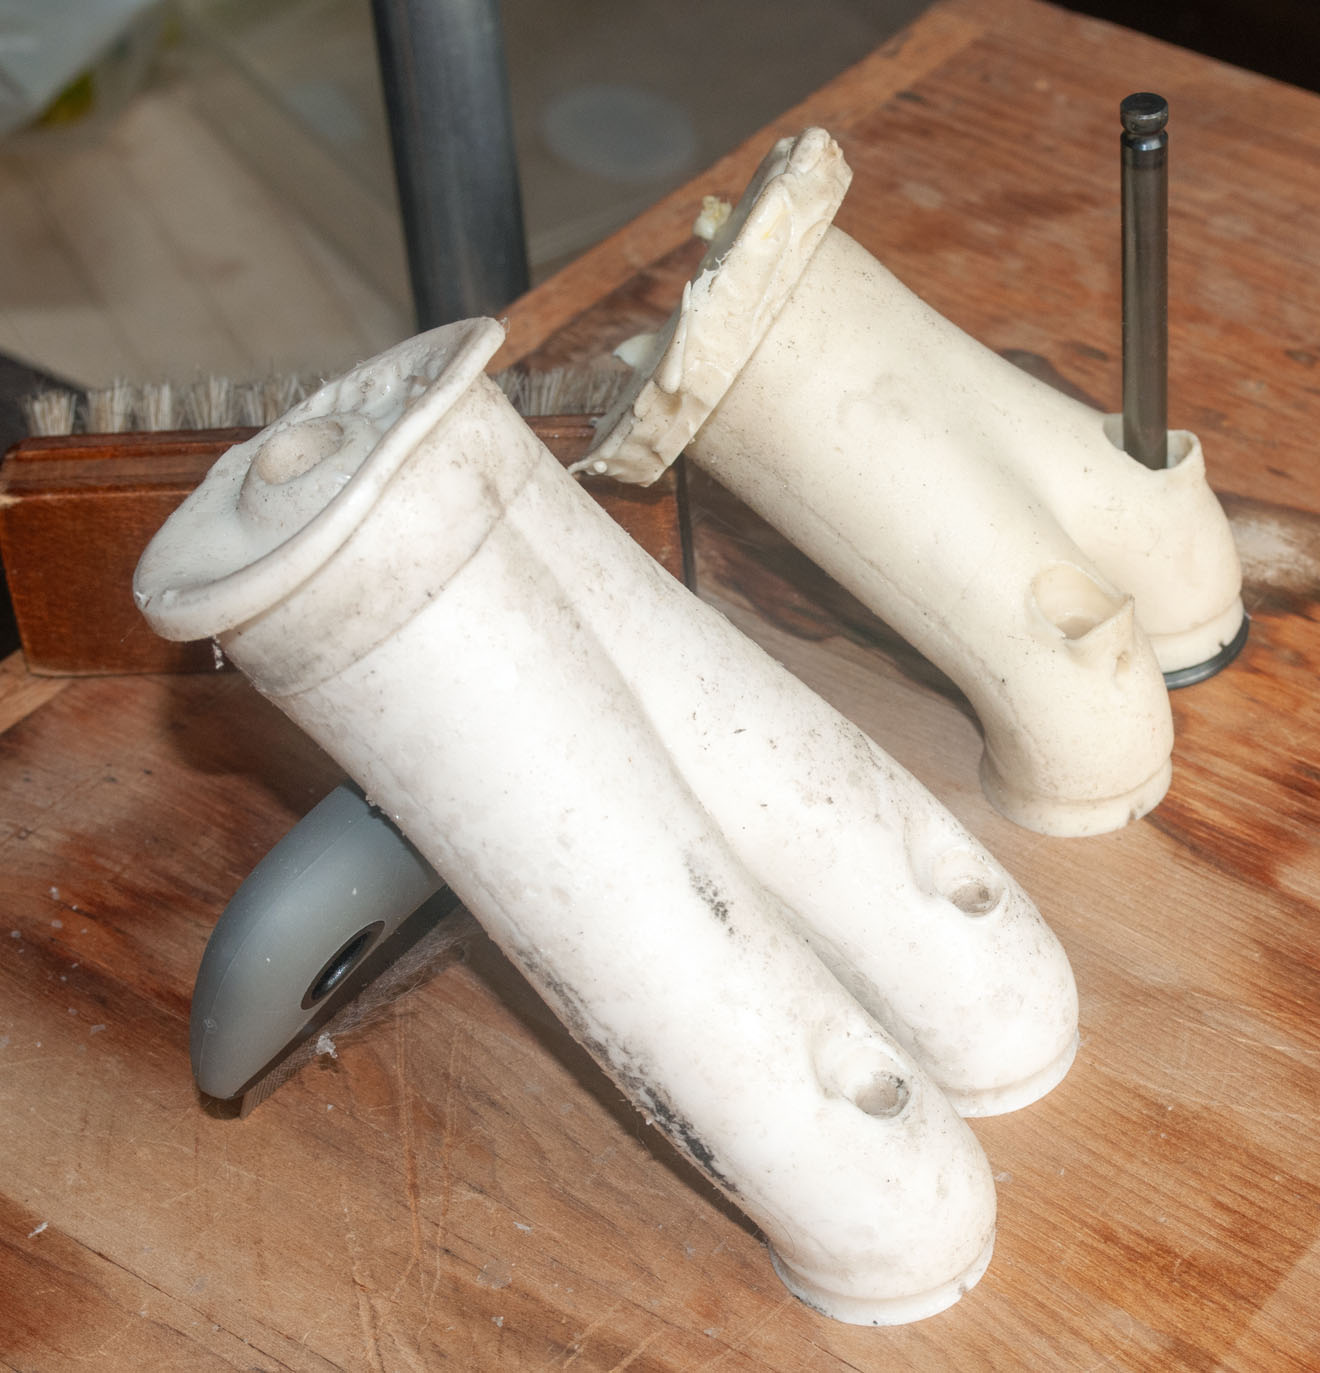
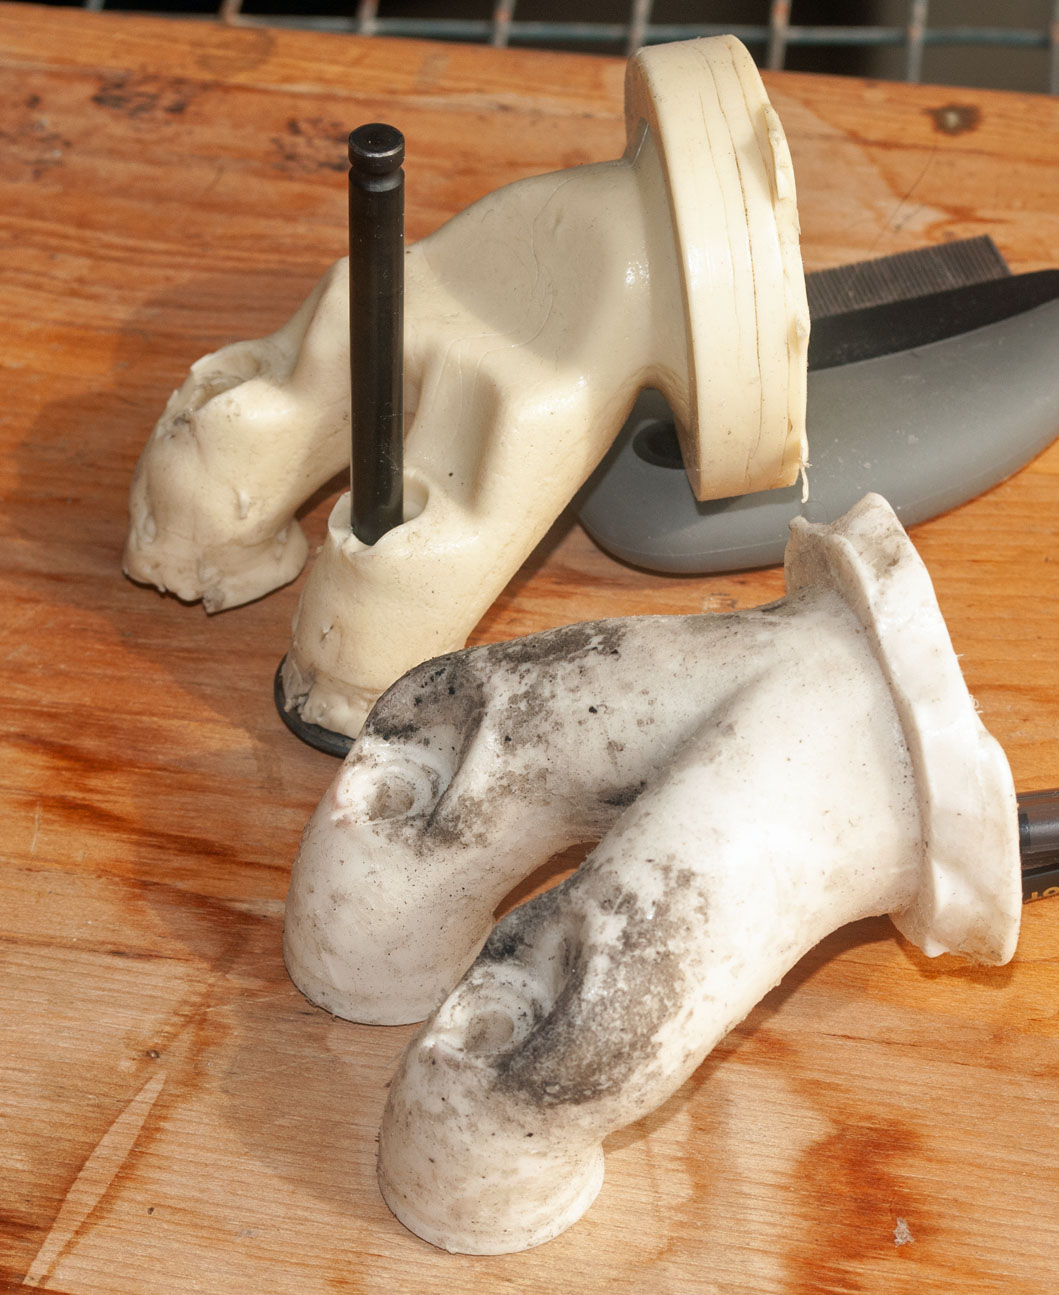
Peering into ports (the cylinder head people I've known usually don't look, instead they insert a finger and feel around in the port) can be a difficult way to tell the shape of them. What is helpful is to pull a mold from the port. 2 part rubber compounds are often used. What I have is a product called "Vinamold" which is vinyl based and can be melted and reused many times. The white compound is of medium stiffness. It also works well without additional powdering when doing a 3D scan.
Last week I ran the spare head through the ultrasonic cleaner many times to get the ports as clean as I could, heated up the Vinamold and poured it in. The intake mold wasn't too difficult to pull out, but the exhaust port took a lot of work as I didn't want to pull too hard and tear it.
I also have some Aprilia/Rotax RSV 1L twin port molds to compare the Suzuki molds to. The Aprilia is a 500cc cylinder making 61.5hp @9500 (per cylinder), and 37.5 hp @ 6500 RPM. The Suzuki is reported to max out at 31hp @ 6500 RPM. The Aprilia is 123 hp/liter, the Suzuki is 47.7 hp/liter. Power will vary with RPM, but the 50% increase in RPM of the Aprilia gives a 2.6X increase in power over the Savage, so it is breathing much better.
I was surprised to find the Savage head had the longer valve stems. I had expected them to be short and contributing to the port needing to bend.
First the intake ports (the molds with a valve in them are the Suzuki ports):
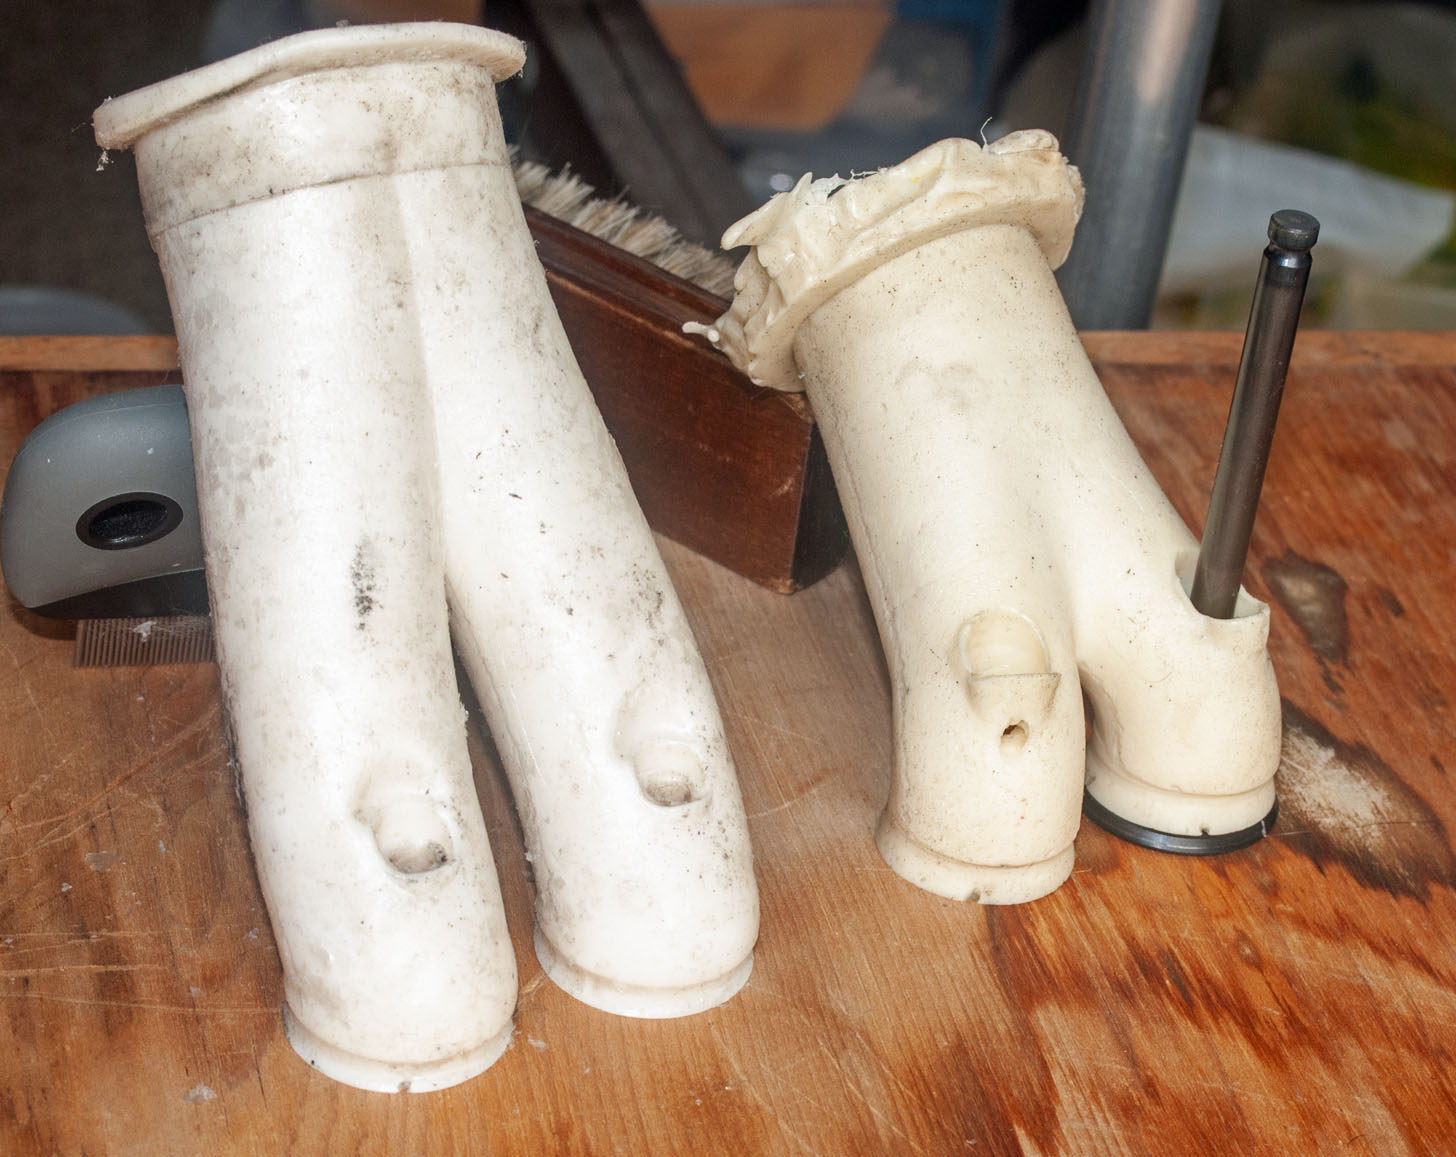
The Savage doesn't benefit from the sidedraft intake, putting a bend in the port, but the shape doesn't look bad.
Now the fun stuff, the exhaust ports:
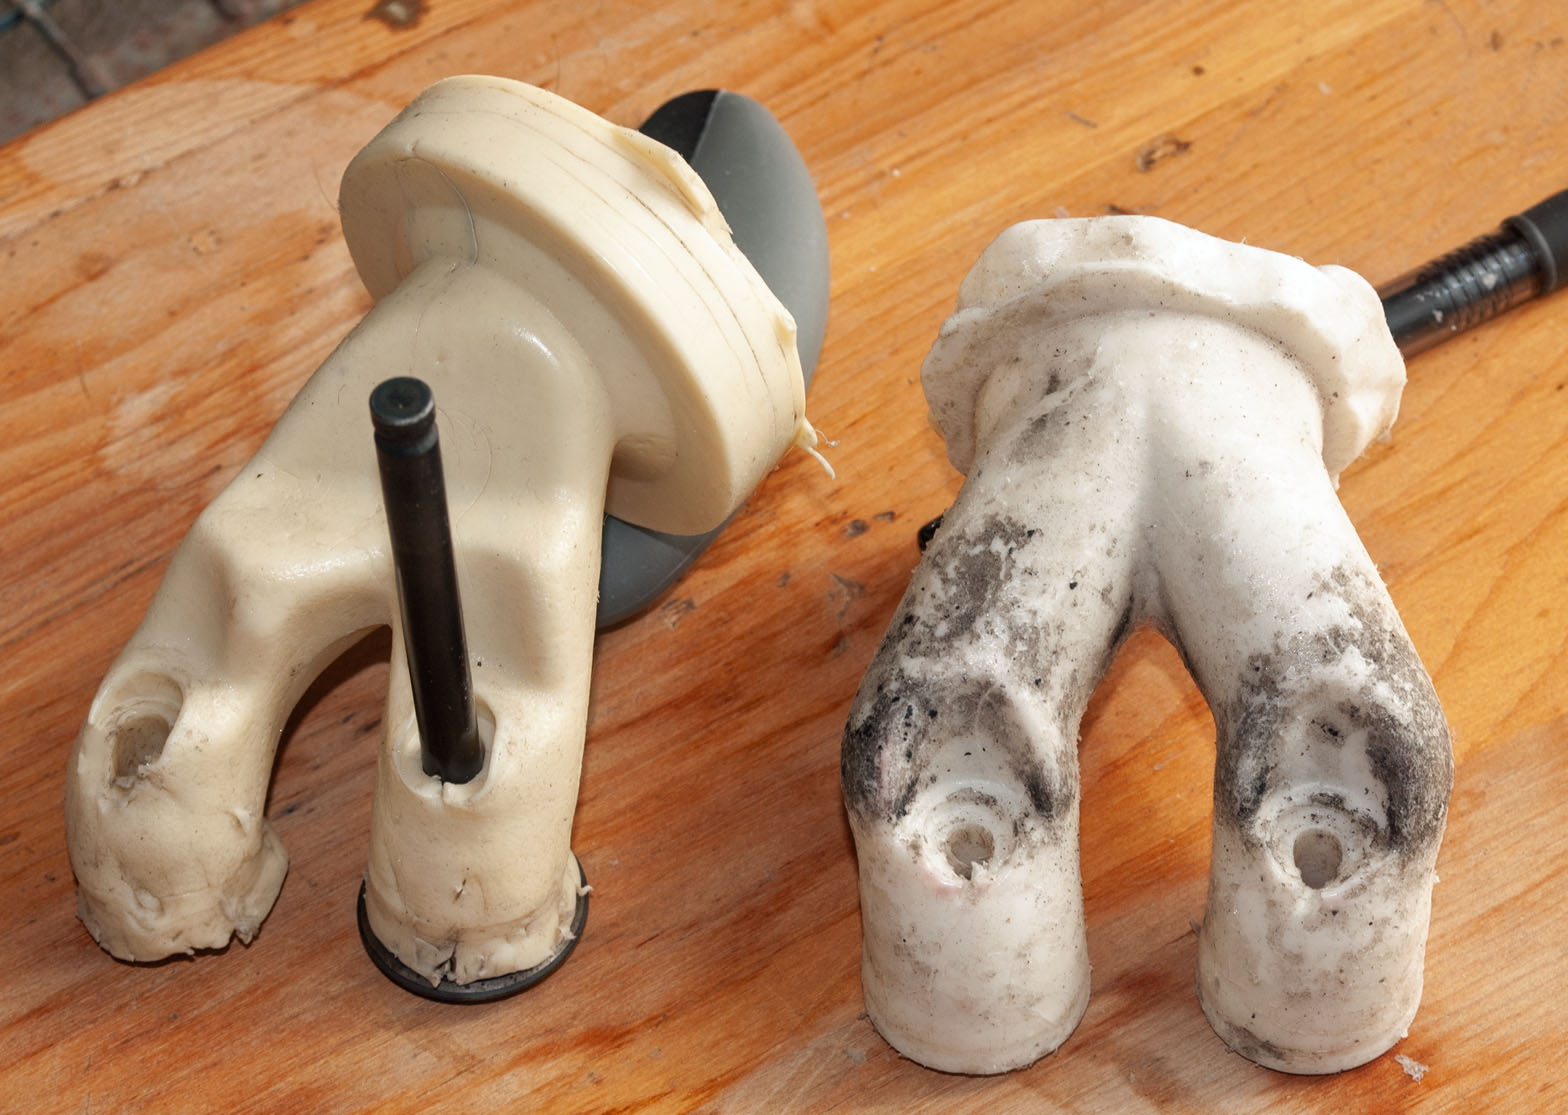
I showed photos of the Suzuki exhaust to a knowledgeable friend who remarked "It is amazing just how bad manufacturers can make things. It looks like the performance chaps had a reasonably good port design, very steep upwards but then the valve chest designer came along and put his dents in it. I sometimes saw this back when I was gainfully employed, two designers at odds with one another or that they just never got together for a chat." Another friend remarked that "good intakes/bad exhaust" has been a combo he's seen on various engines.
Unfortunately, a 7mm thick layer of aluminum can't be easily added in the floor of the trough above the exhaust port because the valve springs are in the way. A quick measurement with "finger calipers" doesn't seem to show the floor of the trough being very thick, though there's probably enough metal to shave a bit off the bottom but a person would want to be pretty cautious when doing that.
At this time in the project I'm not going to worry about it. DBM and others have probably found all the reasonably easy gains. I'll still plan on digging out my Audie FlowQuick test equipment and test this spare head, but I'm not going to be in a big hurry on that.
The Aprilia ports show that much nicer ones can be had, but it would probably take a redesign of the Savage cylinder head to get them
Intake:
Exhaust:
Ignition:
Wheels/Tires:
I have no interest in using the original 19" and 15" wire spoke wheels with tubed tires. I have two options on hand, though my suspicions about one of them was proven when I weighed them (part of the planning process is determining weights of parts where weight is a factor).
The first option is a set of wheels from a Suzuki GSXR-750 circa about 1989. These 3 spoke cast wheels were used on my friend Steve's "Yellow Bike" project, an early CBR600 Honda frame with the Suzuki wheels, brakes and forks and a Yamaha XS650 twin engine. These are 3.5" x 17" front and 4.5" x 17" rear. The second option is a set of wheels from a more modern small sport bike. I was originally going to get a complete set of Kawasaki EX400 Ninja wheels/rotors/sprocket but missed out on what seemed a good price for a set of very clean parts. Since this is not a race project I didn't want to spend $1000s on fancy wheels, and the $750 asked for the Kawasaki wheels (3.0" x 17" front and 4.0" x 17" rear) was appealing. I looked around on eBay and then remembered the CBR250/CBR300 Honda singles that were 2.75" x 17" front and 4.0" x 17" rear, so the same size on the back as the Kawasaki but .25" narrower on the front. When I started looking at them on eBay I found that they didn't seem to be valued very highly. I was able to buy a very clean set without tires AND a complete swing arm with spindles/spacers/adjusters AND a rear caliper and carrier and master cylinder for a bit more than 1/2 the price I had been willing to pay for the Kawasaki wheels/rotors/sprocket. Score!
The Suzuki dual rotors are 310mm OD as is the Kawasaki single front rotor, and the Honda single rotor is 296mm. I'll see if I can find some numbers posted for the weights of the Kawasaki wheels, but the GSXR front with a single rotor and no tire is 14.8 pounds, the rear complete with rotor and sprocket/carrier is 21.7 pounds, the Honda front is 13.2 pounds and the Honda rear is 18.6 pounds, for a total difference of the Honda set being 4.7 pounds lighter. Plus, the Honda rims are narrower than the Suzuki rims so I can run narrower (and likely lighter) tires on them. The OEM Dunlop GPR300 tires on my Ninja 400 seem fine, and the Savage will need a 50% boost in horsepower to match the Kawasaki (weights are somewhat similar) so I don't think there is a need for the wider (and heavier) Suzuki wheels. But until I weighed both sets of wheels I couldn't say which I should plan on using.
Brakes:
The 296mm front rotor on the Honda wheel is probably "good enough" but I have on hand a new Brake Tech racing rotor for a Yamaha R1. It is 330mm OD and 6mm thick. The weight is pretty much equal to the Honda OEM rotor but it will need a small adapter to bridge the space from the wheel hub out to the mounting points for the Yamaha wheel. Until that is made so I can weigh the extra fasteners and the adapter I'll fudge a bit and consider the two rotors as being the same 3.3 pounds weight.
Front Suspension:
Rear Suspension:
Bodywork:
to be continued . . .
Back to the home pageRelated images below: